Speed is critical when it comes to upgrading your mountain bike or any bike for that matter.
When it comes to Derailleurs, both Shimano and Altus are the market leader.
I was surprised by how cheap SHIMANO XT RD-M8000 Rear Derailleur is, that I quickly purchased it from Amazon (Check price). You may want to get it.
Our pick
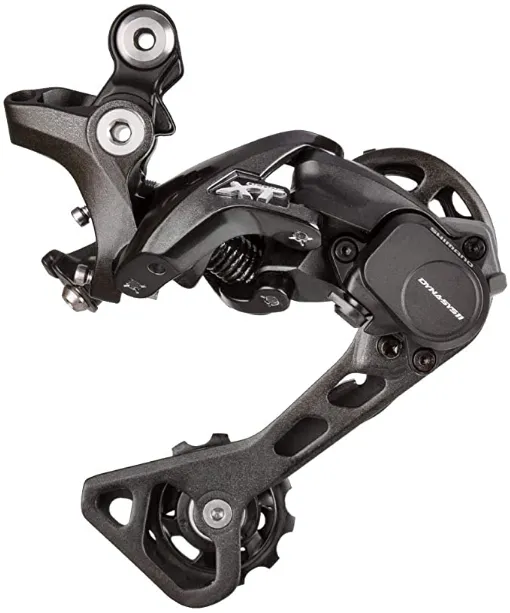
SHIMANO XT RD-M8000 Rear Derailleur
- Rear derailleur that ensures precise, easy gear shifting.
- Integrated chain stabilizer accurate shifting in a variety of conditions.
- 11-speed range.
Moving on, let’s compare Shimano Tourney and Altus.
Here’s the difference between Shimano Tourney and Altus:
The groupset of Shimano sits down at the bottom and comes in 2 x 7, 3 x 7, or 3 x 8-speed options. Altus comes in a 3X system; it has a triple or 3-ring chainring right at the crankset. The newer version of Altus comes in a 3 x 9-speed setup but you’ll still find a lot of 3 x 8 and 3 x 70-speed groups from the manufacturer.
Which brands do you trust in their bike components?
Whether you’re interested in components for your mountain bike or for urban commuting on a bike, you’ll find the right tips in this post.
Here’s the reality: There are a gazillion manufacturers of biking gear, and sometimes, it’s a problem choosing the right one.
If you’re looking to change your rear derailleur or/and learn the difference between the Shimano Tourney and Altus, we have written this article to show you what factors to consider when buying a new rear derailleur and how to get the best out of it.
Keep reading…
We will explain to you how to choose your rear derailleur, without forgetting to give you technical and practical details.
How a rear derailleur works, types of derailleurs, compatibility, derailleur adjustment, maintenance, and assembly: you’ll be glued to this essential element of the bicycle transmission!
Recommended Shimano Derailleurs for Your Bike
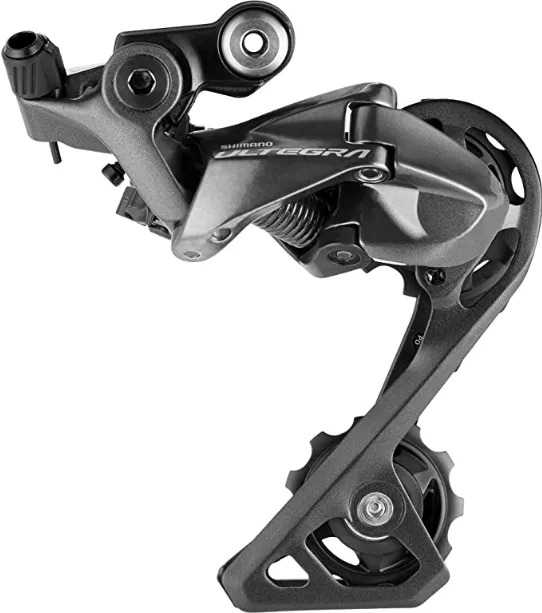
SHIMANO Ultegra R8000 Short-Cage Rear Derailleur
- Stable Shifting Performance
- Shimano Shadow Construction
- Low profile rear design
- Uses an 11-30T cassette
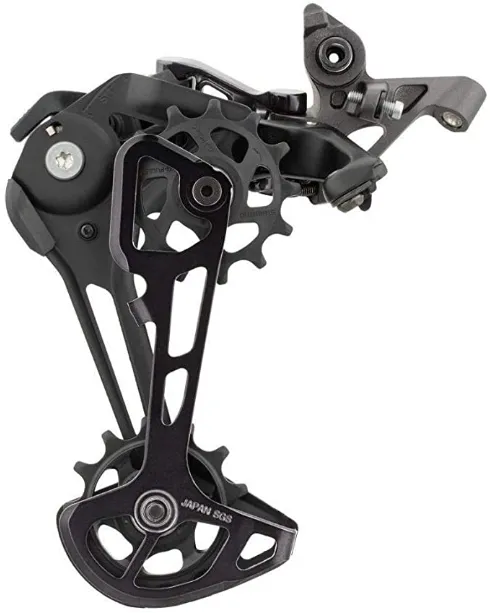
SHIMANO XT RD-M8100 Long Cage Rear Derailleur
- Fast, shockless shifting and low-profile design.
- Large 13T pulleys increase efficiency.
- 12-speed rear
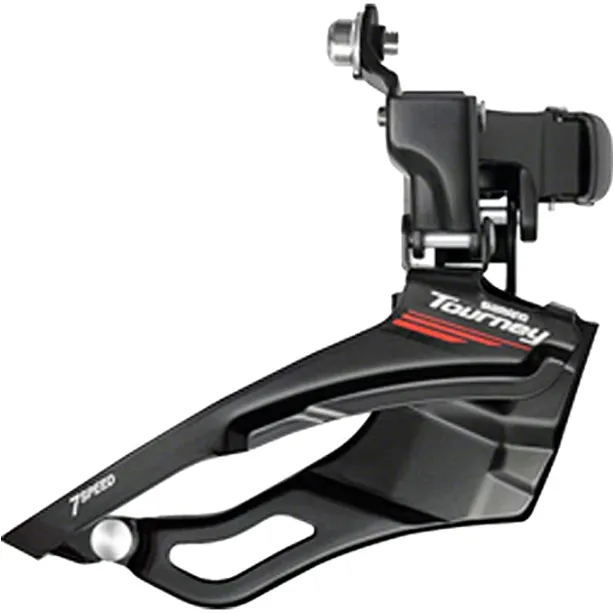
Shimano Tourney Vs Altus
Shimano Tourney 7 speed: Shimano’s entry-level derailleur remains one of the most recognized in the cycle market.
Solid, reliable, and precise, it ensures a quality passage of speed with a minimum of constraints, while making a minimum of noise.
Combined with the Shimano Revoshift gearshift, which makes it even easier to change gear.
Shimano Altus 7 or 8 Speeds: One of the references at Shimano with a quality/price ratio second to none. Of a solidity recognized, it offers you the best mix for leisure use or more sporting.
With 7 or 8 speeds, it allows you to adapt to many situations with Shimano reliability. What to see urban mobility very positively!
Which transmission to choose for your urban bike?
The transmission is an essential part of your bike. She is directly involved in the overall performance of your urban bike. Multiple gear reduction systems are available on the market.
What are the available transmission systems and for which uses? We will see here quickly the anatomy of the transmission of your bike.
We will then detail the different transmission systems so that you can determine the most suitable for your practice.
Anatomy of the transmission of a bicycle. Press with all your strength on the pedals connected to the pedal by the cranks. The forces are transmitted via the trays (often from 1 to 3 trays).
The chain connects to the cassette located at the rear wheel. The rear derailleur allows the movement of the chain on the gears of the cassette. The set starts moving and you move.
Note that manufacturers often create transmissions for a particular purpose. Shimano dominates the bike transmission market.
It is followed to a lesser extent by Sram. We will only deal with these two manufacturers. This will allow us to scan the bike transmission types globally.
Transmissions with derailleur. Shimano equips your ATVs with groups known as XTR, SLX, Deore, XT, or Saint.
These systems equip your bikes cross-country all-terrain and even allow you to ride at high speed as with the Deore. The VTC-equipped Shimano often embarks groups Alivio, Acera, and Altus Tourney.
The latter is used, only dilettante. At Sram, most bikes are equipped with X systems, often X3 to X9.
The 8 or 9-speed derailleur bikes will be enough on flat ground. With more than 20 speeds, you will be able to attack areas with a consequent altitude difference. (But, are 7-speed bikes enough? Read this first)
But the escalation of speeds does not make sense because the chain must remain aligned. All combinations of trays and gables are not exploitable.
The transmissions integrated into the rear hub offer a real advantage for use in the city.
They make it possible to change the speeds at the stop which is appreciable in urban environments where braking and starting are frequent. In addition, you will not derail!
This excludes getting to work with your hands full of grease.
And it is not for nothing that self-service bikes in our cities are equipped with these intuitive and robust systems like the Shimano Nexus 3.
These systems are available by Shimano with 7 and 8 integrated speeds; respectively Nexus 7 and 8.
The latter makes it possible to accept discs for braking. The models Premium and Alfine are advanced and sporty versions of the Nexus. The Sram equivalents are the I Motion (T) 3 or P5 models.
The high-end versions are the S7 model that rivals the Nexus 8 or the I Motion 9 that teases the equivalent Alfine of Shimano.
Integrated transmissions are for me to really consider in town even if a little more expensive than a simple derailleur.
The models of basic integrated transmissions like the Nexus 3 will be enough on the flat. That said, to tackle the slope, high-end models offering greater ranges of speed will be a minimum.
Hybrid transmissions are simply the cohabitation of a conventional derailleur and a gearshift system built into the rear hub.
Really interesting because it often offers a beautiful range of gear ratios to cross the coast and the benefits of the simplicity of the passage of speed in case of restart.
In addition, this system limits the possibility of torsion of the chain. At Sram, you’ll hear about Dual Drive systems here.
Now, let’s consider a few important pieces of information you may be searching for:
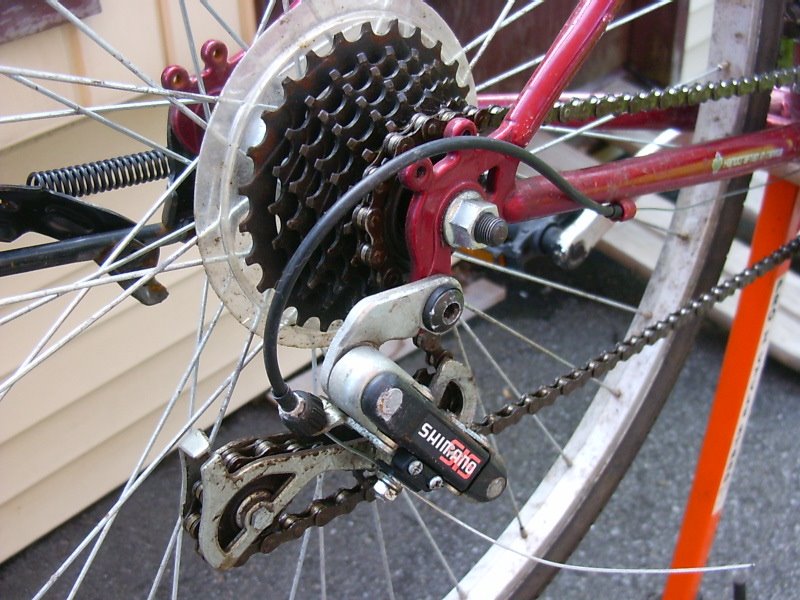
1. Composition and function of the rear derailleur
Essential on a speed bike, the rear derailleur is a mechanism consisting of a spring and rollers for shifting gears. (Can you coast on a single-speed bike?)
A cyclist needs to change gears when the altitude difference changes too.
The derailleur makes it possible to modify the development of the transmission, that is to say, the number of meters traveled each pedal revolution.
We can compare the rear derailleur to the selector of the gearbox of a car: it changes the gear ratio.
Operation of the rear derailleur
The derailleur is attached to the bike frame but moves laterally to guide the chain. It is connected to the shifter by a cable. (What kind of bike frame do pro cyclists use?)
The rear derailleur has two functions: change gears and keep the chain in tension.
A movement of the derailleur lever actuates the cable, which in turn causes the derailleur to move so that the chain moves to another gear.
It is, thanks to a spring that the chain remains stretched whatever the pinion used.
The adjustment of the rear derailleur must be very precise for proper operation of the bike transmission and to avoid derailing.
2. Different types of rear derailleurs
a). The unindexed derailleur (friction system)

The non-indexed derailleur with a friction system is the type of rear derailleur most used until the early 90s, with a controller to the frame or handlebars. Just rotate the joystick to pull the cable and change gears.
With this type of derailleur, it is up to the cyclist to grope, until the speed passes. There are no guts in the controller. Not always easy to find the right position with an unindexed derailleur!
Some of the Advantages:
- Easy setting
- Mechanical simplicity
- Durability
Disadvantages:
- Lack of precision
- Long to shift gears
- Lack of performance
On which bikes?
- Bikes before the 90s: city bikes, mountain bikes, or racing bikes. (How to enjoy mountain biking in the snow)
b). The indexed derailleur
The indexed derailleur appeared in the 1980s. Innovation compared to the friction system? Indexing, that is to say, is a system of notches on the controller.
Each notch corresponds to a pinion. The speeds can be numbered on the shifter.
For good indexing, the entire transmission must be of the same brand in order to have the same characteristics.
Advantages:
- Precision
- Speed
- Ease of use
Disadvantages:
- Setting can be difficult
- May go wrong with the time
On which bikes?
- City bikes
- Racing bikes
- ATV
c). The hub with integrated speeds: a case apart
The hub-integrated gear system is a special case: nothing to do with a rear derailleur.
Indeed, the gear change is done through a gear mechanism integrated inside the hub of the rear wheel.
This means you can have between 3 and 11 gears, but only one gear and no derailleur.
Advantages:
- Intuitive operation
- No chain crossing
- Speed changes when stopped
Disadvantages:
- High price
- Repairs by a specialist
- Heavier
- Does not allow forcing by changing speed (no sporting use)
On which bikes?
- Urban bikes
- Electric bicycles
- Folding bicycles
d). The electronically-controlled derailleur

The electronically controlled derailleur is a real technological advance for cycling in competition.
The gearshift is no longer done by cable: the management of the transmission is electronic. These are electric motors that generate the movements of the derailleurs.
Advantages:
- Speed in gear changes
- Shifting without forcing
- Automatic indexing
- More cables
- Easy adjustment
Disadvantages:
- Battery operation: autonomy to take into account
- Location of the battery
- Heavier
- Expensive
On which bikes?
- Road bikes and competition mountain bikes. (Can you commute on a road bike?)
e). Nuvinci Integrated Variable Speed Drive Hub

The Nuvinci Integrated Variable Speed Drive Hub is a revolutionary hub that works as a drive. That is to say?
No gears, no indexed speeds: the number of speeds is infinite! The more you turn the handle, the longer the development (“hard” for beginners!).
This is the ideal type of transmission for a pedelec-equipped pedelec: the shifting into power or hill can be done more flexibly. No need to reduce the pace of pedaling so that the speed engages.
f). How to recognize the type of derailleur on a bike?
In case of breakage of his derailleur, one needs to find an identical model (or compatible) to replace it.
Recognizing the type of derailleur on your bike is not always easy, especially when you’re new to it. Just ask the right questions to recognize the type of derailleur on your bike:
Are you equipped with a rear derailleur and derailleur control handle?
- If a joystick, but no derailleur => a gear hub is integrated
- If a joystick and a derailleur => classic derailleur
Does your shift lever have notches or numbers?
- If numbers or notches => indexed derailleur
- If no notches or numbers => unindexed derailleur (friction system)
How many sprockets does your bike have?
This information is essential to choosing a derailleur.
What is the brand of your derailleur?
This information is very important to find a derailleur model compatible with your transmission.
What is the fork length of your derailleur?
See paragraph below: The clevis length of a rear derailleur
Practical tip: consider taking some pictures of your derailleur for customer service or the bike shop. It can always be useful to avoid mistakes.
3. Go further in the world of the rear derailleur
i). The compatibility: The number of speeds The indexed rear derailleur (the most common today) is designed for a defined number of speeds.
Your derailleur can be developed for the transmission of 3, 5, 6, 7, 8, 9, 10, 11, or more gears.
The rear derailleur must always correspond to the number of speeds of your cassette or freewheel. For example: equip yourself with a 7-speed derailleur for a 7-speed cassette.
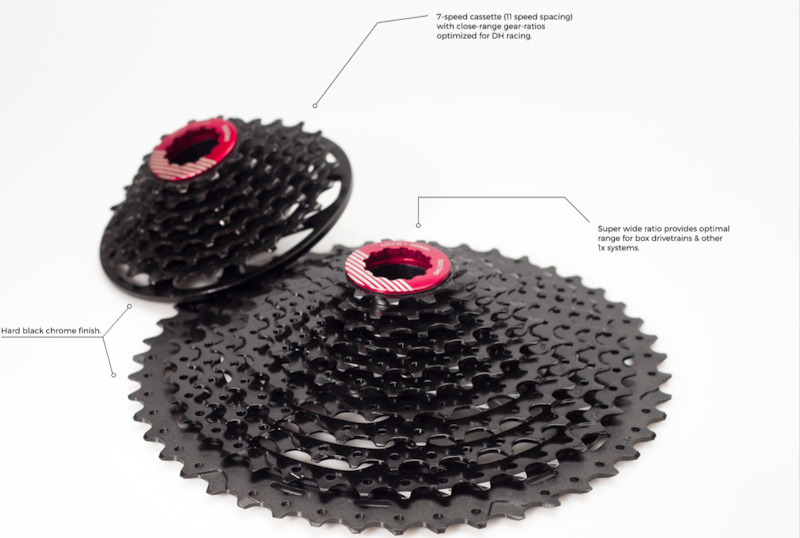
Do not mount a 9-speed derailleur with a 7-speed cassette: Indexing would not work.
Marks
Three brands share the derailleur and bike transmission market: SRAM, Shimano, and Campagnolo. Do not mix marks for the same transmission!
Important: It is advisable not to mix the marks for the same transmission to avoid compatibility problems.
The length of the screed
The tread length of your rear derailleur must be compatible with the number of trays (see chapter below: The length of the clevis of a rear derailleur).
ii). The clevis length of a rear derailleur
There are three screed lengths in the world of the rear derailleur: the short screed, the middle screed, and the long screed.
The short screed
A short clevis rear derailleur is light, less exposed to impact (because the screed is shorter) and gives the possibility of reducing the length of the chain.
But it does not allow all combinations between trays and gables! It is usually mounted on single-deck bikes.
The long screed
A long clevis rear derailleur is suitable for a larger number of gears and for a greater difference between the trays.
Why this difference? The screed is longer, so the chain is longer too. It will be able to join without problem the largest pinion and the biggest plate.
What is the risk of a derailleur hanger too short? The chain may be too tight when you are on the big sprocket and the big plate. Speeds can be difficult to pass, and the risk of breakage is greater.
The middle screed
It is an intermediate clevis that is generally suitable for double or triple trays.
On a road bike or an ATV and in sports use, in particular, we are looking for a minimum weight and maximum robustness. So we try to mount a screed as small as possible according to its use.
iii). The pebbles
The derailleur rollers are small wheels allowing the chain to circulate, but especially helping to guide the chain during gear changes.
Often neglected by cyclists, pebbles are very important for a good gear change.
The derailleur rollers are often polyoxymethylene plastic: they are relatively silent and resistant to the passage of the chain. There are also aluminum models.
Attention: on a rear derailleur, we differentiate the tension roller (lower roller) from the guide roller (upper roller)!
Just like the elements of the transmission (chain, cassette, etc), the derailleur rollers are to be replaced regularly according to the use: approximately every 10,000 kilometers.
A roller is worn when its teeth are pointed or rounded or when it has lateral play. A pebble can also be used in thickness.
The consequences of worn pebbles and in bad condition:
- Bad fitting of teeth in the chain
- Noise
- Loss of precision in the transmission
Good to know: it is necessary to mount the rollers identical to the original rollers in case of replacement, each derailleur using its own rollers.
Do not be fooled into making original combinations (e.g., Shimano Altus derailleur shifters on Shimano Deore derailleur).
Attention to the direction of rotation of the rollers during assembly!
iv). The derailleur hanger
The derailleur hanger is an intermediate between the frame and the derailleur. Because of its aluminum design, it functions as a kind of fuse.
It is the one that breaks in the event of a fall or shock in order to avoid damaging or distorting the derailleur.
A derailleur hanger is not expensive to buy and can be easily replaced. Better to change a derailleur hanger than a rear derailleur? However, it must always be aligned with the axis of the bike.
Good to know: it is possible to straighten a derailleur hanger.
Be careful, there are dozens and dozens of legs. Each has a specific form-fitting the frame of the bike. Models are rarely interchangeable.
4. Choose a bike derailleur that will suit your objective
i). Urban bicycle: If you move on the flat: a 3-speed derailleur is enough. For regular use and on hilly terrain, the 5 to 8-speed derailleur will do the trick.
Finally, for daily trips by bike, it is better to be equipped with a derailleur from 8 to 11 speeds and 2 or 3 trays.
Choose an entry-level model if you use your bike very occasionally, and get into the range if you use your bike frequently to improve your comfort.
The integrated gear hub is perfect for city use. For those who have never tried and want to try, try the self-service bikes available in the big cities!
b). Road bike: For the practice of road cycling, you need smooth and safe gear changes, especially for sporty use. (Best Road bike upgrades you have never seen before)
The rear derailleurs are therefore reliable and ultra-precise. For the competition, the electronically controlled derailleur is ultra-efficient.
Note that one can usually opt for a short clevis derailleur on a two-deck road bike and a medium or long fork derailleur for a 3-deck road bike.
c). MTB (Mountain Bike): By mountain bike, it’s like a road bike. The gear changes are very precise.
The derailleur must also be resistant to possible shocks. In competition, some mountain bikers also use an electronically controlled derailleur for maximum performance.
ATVs are usually equipped with 3 trays. It is, therefore, preferable to opt for a rear derailleur medium or long screed.
Medium-chained derails are less likely to come into contact with stones when you go out on the roads.
However, the longer clevis rear derailleur allows a wider choice of speeds and offers a better chain line.
5. Adjusting a rear derailleur
The adjustment of a rear derailleur is done on a shop floor or with a suspended bicycle if necessary.
It must be possible to pedal (with the hand) and turn the rear wheel to test the gearshift and adjust more easily.
The tools:
- Allen Keys
- Cable cutter
- Universal pliers or long nose pliers
- Flat or Phillips screwdriver (depending on the derailleur)
The setting of the stops:
The first adjustment of the rear derailleur is the position of the stops. The lower stop (L-bolt on the derailleur = Low) and the upper stop (H-bolt on the derailleur = High) limit the derailleur travel.
Once properly adjusted, the derailleur will only move from the small sprocket to the large sprocket.
An incorrectly adjusted stop may cause derailment or block the chain from the last pinion.
There are no letters written on the derailleur of your bike? You just have to screw one of the two screws and see the action of the derailleur!
It is advisable to position yourself on the middle plate for a good adjustment.
The principle is simple: adjust the stops to position the derailleur guide roller in alignment with the small pinion (High stop) and the large pinion (Low stop). Pedal by hand and test first and last speed.
Important things to Remember:
- Unscrew to move the stop to the outside of the frame
- Screw to move the stop towards the center of the wheel
A derailleur has well-adjusted stops when it moves up and down without derailing and when there is no rattling on the first and last sprockets.
Test your setting in all cases: fast descent speeds and small and large trays.
Good to know: It is possible to adjust the stops without cable, by manually handling the derailleur.
The tension of the cable: The tension of the derailleur cable allows the speeds to pass smoothly. The tension is made once the stop adjustment is made.
How to stretch a derailleur cable:
- Loosen the cable (if adjustment)
- Set the adjustment wheel to halfway (then add or remove tension)
- Position the shifters on the last sprocket and the second plate
- Tighten the cable by hand, then adjust the clamping screw
- Then refine the tension adjustment with the knob.
Test place: Pedal with one hand, and shift gears with the other.
Some speeds are hard to ride?
The cable lacks voltage. Turn the knob to add cable tension.
Do some speeds have trouble going down?
The cable is too tight. Turn the knob to remove cable tension.
Continue the tests until you find the right setting, then fine-tune the setting by trying the fast descents of the gears, but also by using all the trays.
Attention, a cable and sheath in good condition and lubricated, is essential for speeds that pass well. The chain can not get down to the last gear? Is your stop properly adjusted?
6. Useful information on cables and derailleur sheaths
i). Diameter of cable and derailleur sheath: Like the brake cable, the derailleur cable is made of stainless steel.
Its diameter of 1.2 mm is slightly smaller than the brake cable. Indeed, a derailleur cable with less power to transmit a brake cable.
On the other hand, it must have better resistance to elongation. There is only one end of the derailleur cable, impossible to be wrong!
The derailleur sheath is also of a different diameter to that of a brake sheath: it is 4 mm in diameter. Its design is specific: the derailleur sheath is in-compressible to ensure maximum precision in shifting.
It is not composed of spirals (like a brake sheath), but of longitudinal threads to limit compression.
A Teflon coating can be applied inside the sheath to improve the sliding of the cable.
ii). Wear and replacement: recognize a derailleur cable at end of life: The cables are part of the elements to check regularly.
To make sure they are in good condition, just look at the cable is not frayed at the nut on the derailleur, or at the speed knob.
A frayed cable is to be replaced without delay.
7. Disassembly and maintenance of a rear derailleur
i). The assembly and disassembly of a rear derailleur: Mounting a rear derailleur is a very simple operation.
The derailleur is attached to the derailleur hanger by means of a screw only. Tighten the fixing screw making sure that the lug is in the notch.
To position the chain, you have two solutions:
- Disassemble the rollers to pass the chain
- Use a drift chain to open the chain and pass it between the rollers
The last step is to pass the cable through the strain relief and proceed to tensioning and adjusting the stops.
To disassemble? It’s simply the opposite!
ii). Maintenance of a rear derailleur: A rear derailleur requires little maintenance. Make sure your derailleur stays clean.
Do not hesitate to clean it, after a mountain bike ride in the mud. Use a brush for cleaning bike transmission for example. (How to properly ride a mountain bike like a pro)
Lubricate from time to time your rear derailleur as well as the cable and the sheath.
From time to time, also clean the rollers of your rear derailleur and peel off the dirt. The rollers are the only elements that wear out and replace themselves (see paragraph concerning the rollers).
To determine the wear of a derailleur, simply pinch the derailleur at the lower roller and try to make lateral movements.
If the derailleur moves, it is worn out. Its replacement is, therefore, necessary to keep a good gear shift.
Wrap Up
Basically, your choice of bike transmission depends on your playground. Exclusively on flat, you can use a minimalist transmission such as the “fixies”.
Some speeds can however be appreciated especially with a comfortable system like the Nexus 3.
If you have a course with a difference in altitude, you need a transmission with more variations to avoid walking next to your mount!
A good old derailleur, a high-end integrated transmission, or even a hybrid system offers you the advantages of the two previous systems.
SHIMANO Ultegra R8000 Short-Cage Rear Derailleur
- Stable Shifting Performance
- Shimano Shadow Construction
- Low profile rear design
- Uses an 11-30T cassette